Summary: Looking for a solution to transfer Bluehost email to Gmail account? If yes, you are on the right post. This blog will teach you step-by-step solution using a manual method and a professional tool. So let’s start.
Bluehost vs Gmail
Bluehost is one of the leading website hosting providers powering over 2 million websites. One of the reasons for its popularity is that it demystifies the process of setting up its website for the first time. It also offers a webmail service for communicating with others and accessing data anytime anywhere.
Gmail is a popular free email service that is being used by billions of users worldwide. The best part of Gmail is its interface that is very simple yet advanced. It does not need any technical skills to know how it works. Also, it offers so many smart features such as spam filtering, integration with other Google apps, and more.
Why to Import Bluehost to Google Mail?
- Save all your emails in one Gmail inbox.
- Gmail offers advanced spam filters and protection.
- It provides large free storage space for your emails.
- You can view your emails anywhere using the Gmail app.
- You can use Google’s tools like Calendar and Drive with your mail.
How to Save Bluehost Emails to Gmail Manually?
The manual process is divided into two parts. Before going to the steps it is recommended to backup Bluehost emails locally. Follow the below steps:
Step 1: Configure Account via IMAP
1. Sign in to your Gmail account.
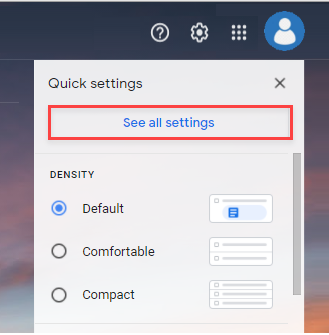
2. Click the gear icon in the top left to open Settings, then click See all Settings.
3. Click Accounts and Import.
4. Scroll down and in the Check email from other accounts section, click Add email account.

5. Now, enter the email address and password for your email account.

6. Enter the POP server. This depends on whether you use the Always Secure Connection (SSL) option.
No SSL: This is a domain name that starts with “mail”.
With SSL: This is the hostname of the server. Also, make sure the port is changed to 995.

7. Select any additional options you want. We recommend that you select Leave a copy of retrieved messages on the server for easy access to your mail from any computer.
8. Finally, click the Add Account button.
Step 2: Setup Outgoing Mail (SMTP)
1. Select Yes, and allow me to send mail as admin@example.com.

2. Choose whether to use this address as an alias.

3. Click the Add Account button.
4. To send, select Send via SMTP server at example.com.
5. Enter your SMTP server.
No SSL: This is a domain name that starts with “mail”.
With SSL: This is the hostname of the server. If you don’t know the hostname of your server, go to Control Panel. On the left, you will see a section called Statistics. Click the Expand Statistics link, if available. The hostname will appear in the statistics list.
6. Then enter your full email address as your username.
7. After that enter the password for your email account.
8. Select port 25 (no SSL) or 465 (SSL).

9. Finally, select Add Account.
Limitations of Manual Approach
- Takes a lot of time for large mailboxes.
- Needs technical knowledge of server settings.
- High risk of data loss or errors.
- Cannot migrate contacts or calendars.
- Does not maintain exact folder structure.
How to Transfer Emails from Bluehost to Gmail Automatically?
Yota Email Migrator is a direct solution to move your Bluehost mailbox to Gmail with attachments. All you need to enter the login details of your both accounts. And, you don’t have to worry about your data. The utility does not store or share any details of your account.
The software keeps your folder and subfolder structure intact, so your mailbox looks organized in Gmail. You can choose to move all emails or only selected folders. This program supports various emails platforms like Office 365, Yahoo, etc. Its simple interface lets a new user to use the tool, even without technical know-how.
Steps to Migrate Bluehost to Gmail Directly are;
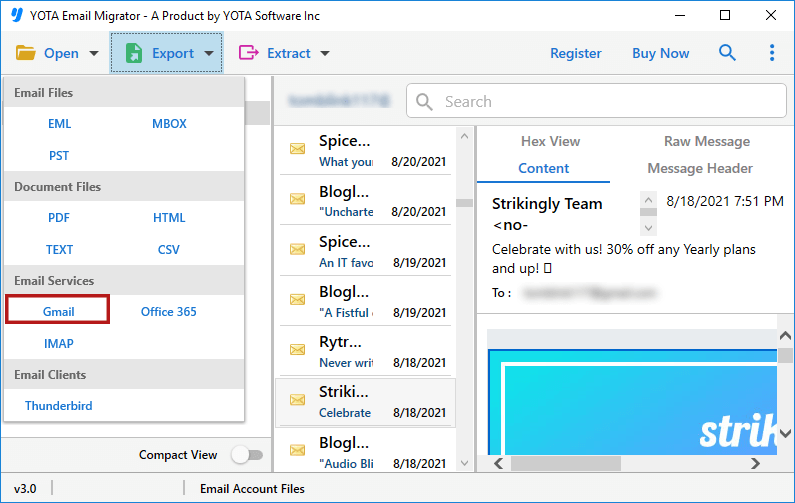
- Run the tool and click Open > Email Accounts > Add Account.

- Enter the email ID, password, and IMAP server details of the Bluehost account.

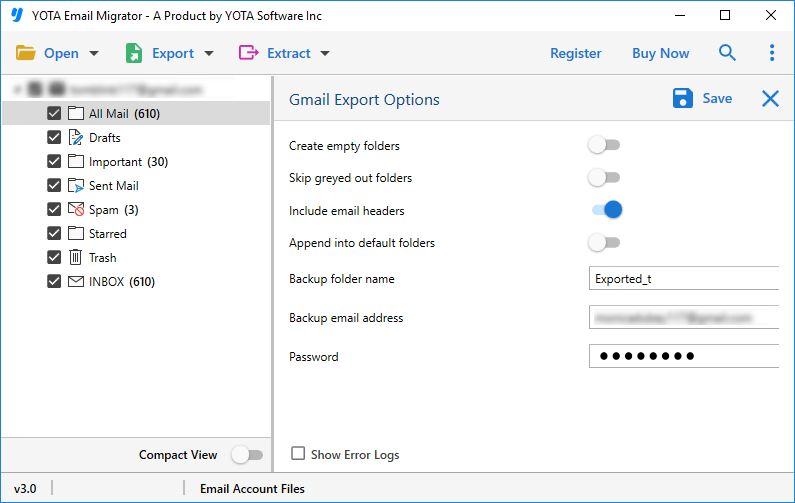
- Select the folders and hit the Export option then select Gmail as a saving option.
- Lastly, put the credentials of your Gmail account and click on the Save button.
The process starts immediately and you will receive a completion message on your screen. After that, you can log in to your Gmail account and review the imported emails. That’s it!
Check this video and learn the steps to transfer emails to Gmail account directly.
Frequently Asked Questions
Can I transfer only selected emails?
Yes, with the help of the automated tool, you can migrate selective emails using various smart filter options.
Will the migration affect my existing Gmail emails?
No, it does not overwrite or delete your existing emails in your Gmail mailbox. You can access your old emails without any issue.
What if I want to export attachments also from BlueHost to Gmail?
If you are moving emails using professional tool, then all your attachments will also be migrated along with the emails.
Conclusion
In the above blog, we have discussed the two best methods to transfer Bluehost email to Gmail. As you can see, manual methods have limitations like no bulk migration, require lots of technical set up and time taking process. If you want quick and error-free results, automated solution is the best option.