In today’s blog, you will get to know all about how to export Rackspace email to PST file. If you also want to export emails from Rackspace to PST, you must read this post till the end.
Table of Content
Reasons to Export Rackspace Email to PST File
A few days ago, Rackspace confirmed that it was hit by a ransomware attack that affected its email services. The cloud company called it an isolated incident that crippled its hosted exchange implementations.
After this case, many organizations were unable to access their Rackspace email data and faced many problems. To avoid such situations, many of them want to switch from Rackspace to a secure platform like MS Outlook.
There is no direct or official way to perform this migration. It is required to first export emails from Rackspace to PST file format which is supported by Outlook. Once users have a PST file, they can import it into an Outlook account using the inbuilt Import feature.
Quick Solution for Rackspace Export Mailbox to PST
To export Rackspace email to PST, experts suggest using the Yota Rackspace Backup Tool for quick results. This is the most secure and reliable utility that lets you perform Rackspace export mailbox to PST in bulk without any loss. It provides you the option to select a location on your PC to store the resultant file.
The software does not need the support of any other applications including Outlook to complete this task. Users can smoothly download as many emails from their webmail account without any modification. Its friendly interface makes it accessible even to a normal computer user to easily perform this task without any technical help.
With this tool, it becomes easy for the users to perform export Rackspace to PST along with all email attachments. Plus, it provides you the freedom to transfer only specific emails and save time. The software allows you to filter Rackspace email before starting the procedure. It also has the option to migrate email form Rackspace to Gmail account.
To begin the task, first, you must download and install the software on your system. After installation, follow these simple steps to perform the Rackspace export mailbox to PST task.
Steps to Export Rackspace Email to PST are as follows;
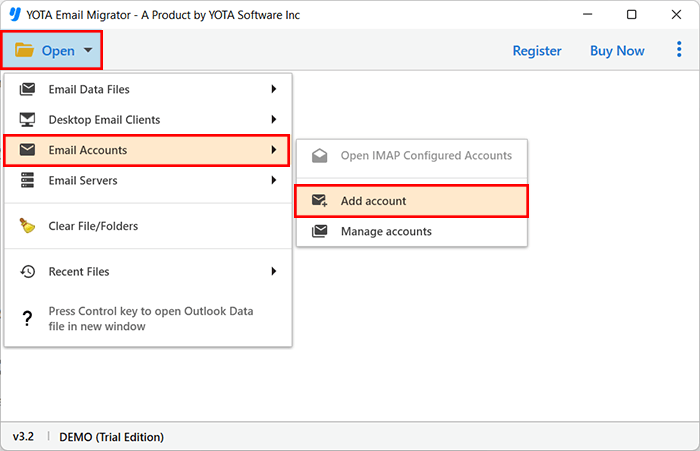
- Run the Yota Email Backup Tool and click Open >> Email Accounts >> Add Account.
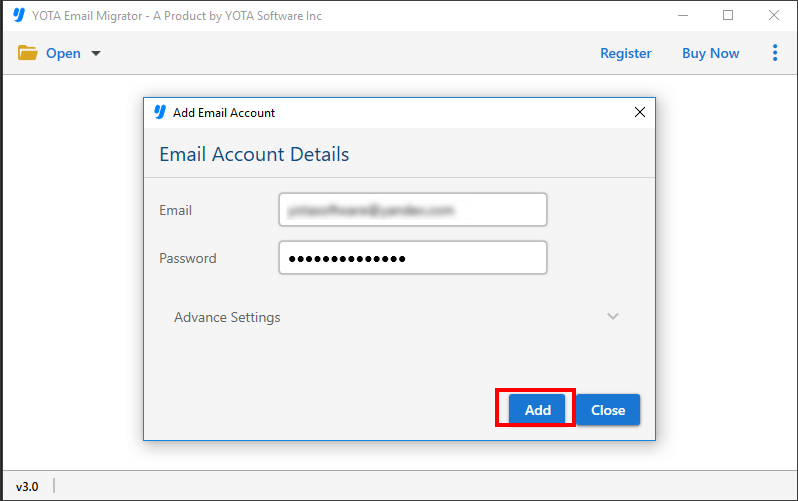
- Then add the login ID and App password of Rackspace webmail.
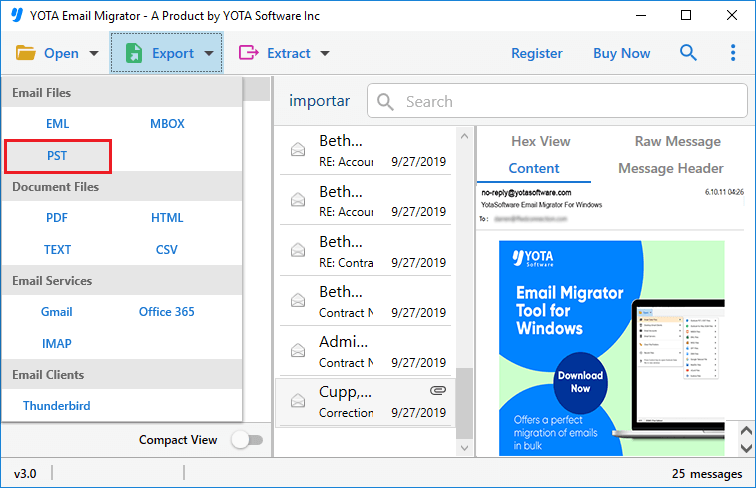
- Preview email data, click Export, and select PST as a file format.
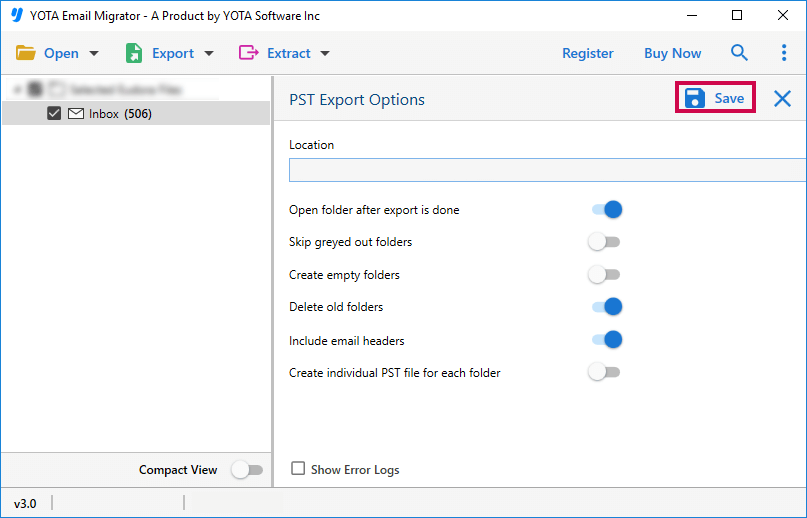
- Now, pick a path to store output and click on the Save button.
That’s it. This is the overall procedure to export Rackspace email to PST without any data loss and technical knowledge.
Watch the full video and learn the quick method to export emails from Rackspace to PST for Outlook.
Why Choose Rackspace Export Mailbox to PST Tool?
There are many reasons for choosing this software such as it is easy to use, supports all Windows platforms, bulk conversion, and more. Some of the highlighted features are mentioned here:
- Bulk Export: The software provides you the freedom to securely export multiple emails from Rackspace to PST in one go. Furthermore, it is capable of transferring unlimited and any size of emails without any loss.
- No External Utility Required: It enables you to export Rackspace email to PST without Outlook and other applications and programs. The software is capable enough to accomplish this task on its own. Moreover, you can directly migrate Rackspace email to Office 365 account with this tool.
- Demo to Try: If you want to try the tool before moving further, then you can download its demo version. It allows you to export the first 10 emails per folder without any cost. The demo edition can be easily installed on any Windows OS version.
- Selective Export: The software gives you the option to transfer only required emails from your web account. Users can filter their emails by from, to, cc, content, attachments, etc.
Manual Method to Export Rackspace Email to PST
- First of all, you need to sign in to Archive Manager.
- On the left side of your dashboard, click on the Search.
- Then find the search name you searched for to export and click Run.
- Select the checkboxes of the emails you want to export and click the Export option.
- Click Next to confirm how many emails you want to export.
- Then select the file format as PST.
- Specify an export name. Then check the box to receive an email notification when the export is complete.
- Now, click on the Request Export option.
- Click the Export tab to start the download process.
- Lastly, find your exported search and click on Download.
Done! Rackspace itself offers this method. However, it has some limitations as well.
Limitations
- Users can only export less number of Rackspace emails.
- It is available to users with Admin, Compliance, or Search Admin privileges.
- You can export search results with a maximum size of 20 GB or 30 KB.
- Users have to pay $9 per GB of PST.
Final Words
To keep their emails safe and secure from hackers, users want to save them on a PC or other email service. Therefore, many users want to export Rackspace email to PST and access emails in the Outlook application. In the blog above, we have discussed the direct and manual methods to export emails from Rackspace to PST file. You can go with whatever method works best for you to perform Rackspace export mailbox to PST.
FAQs
Question 1. How do I export emails from Rackspace to PST?
Answer. Follow the below steps to export Rackspace email to PST:
- Run the Yota IMAP Backup Tool.
- Click Open, Email Accounts and Add Account.
- Enter Rackspace Webmail login details.
- Click Export and pick PST file format.
- Hit the Save button.
Question 2. Can I export all email folders to PST from Rackspace webmail?
Answer. Yes, the tool allows you to convert emails from all folders to PST at the same time.
Question 3. How do I export Rackspace to PST without Outlook?
Answer. Yota Rackspace email backup software helps you export Rackspace email to PST file without installing any additional applications.


